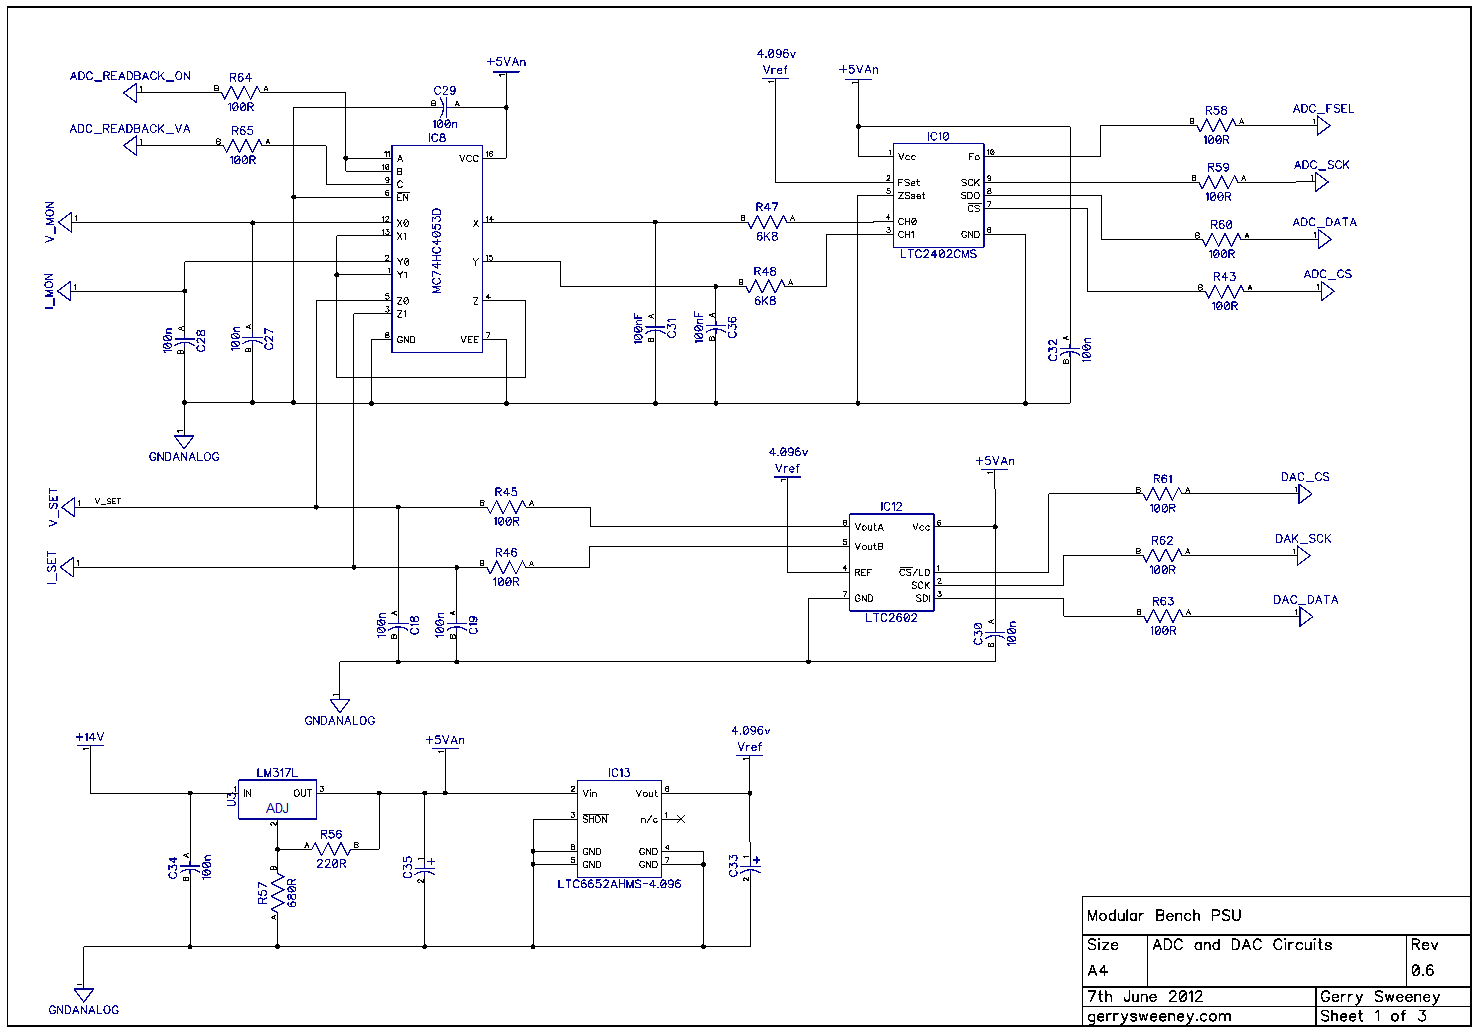
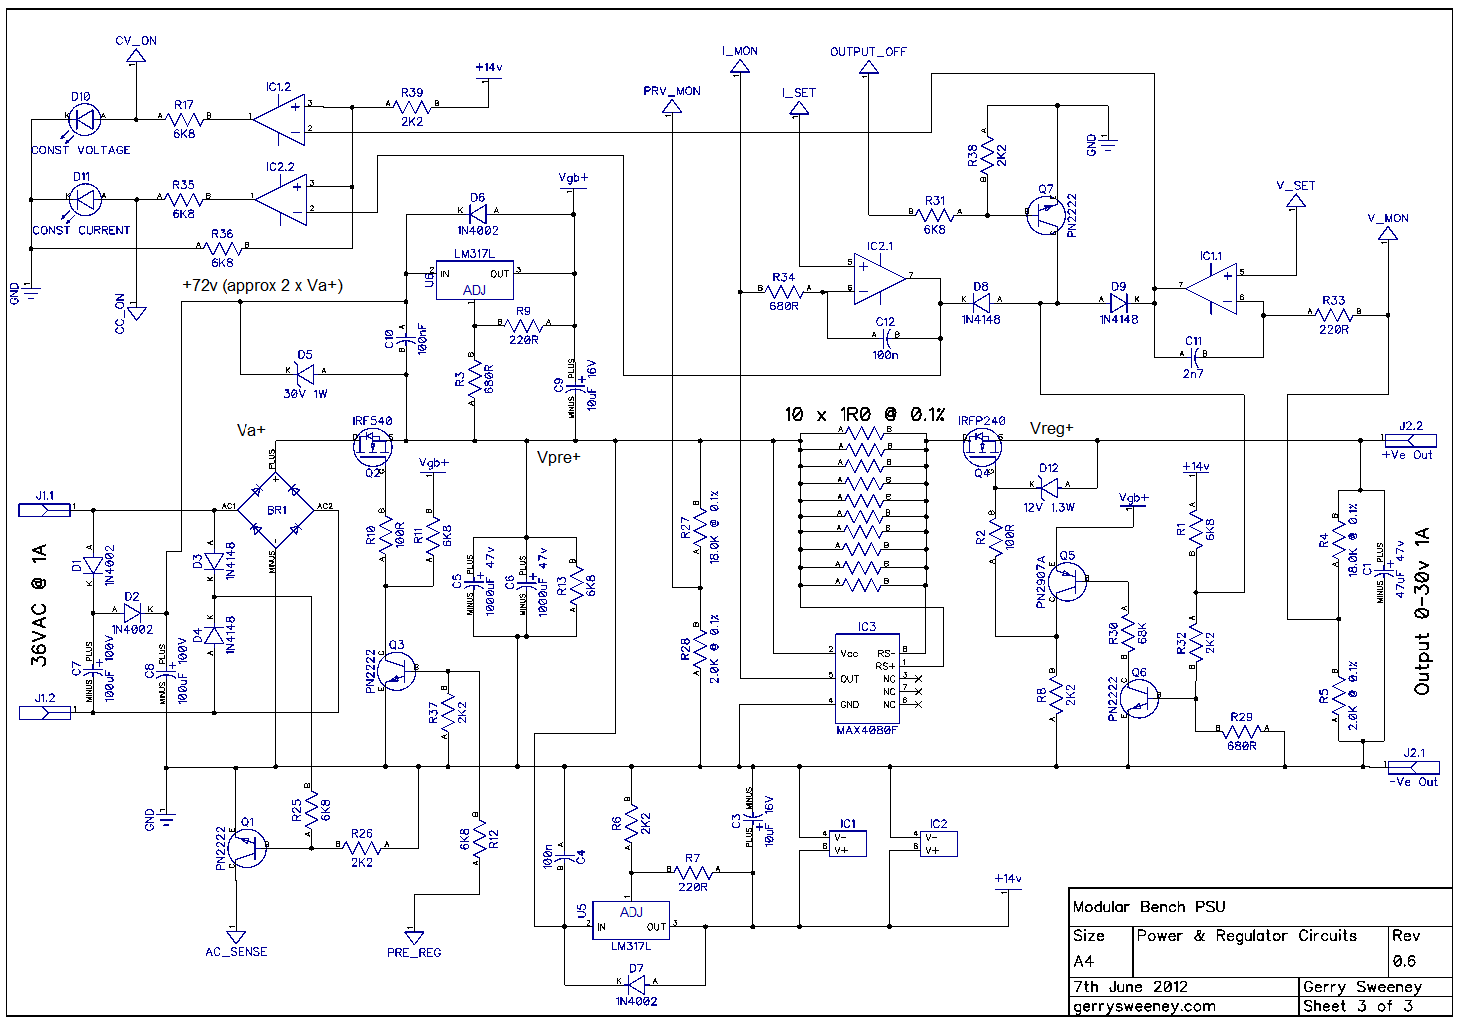
After a fairly disappointing start with the 12-bit DAC from Microchip I have chnaged the DAC to a 16-bit resolution part LTC2602 from Linear Technology. The goal of getting a resolution that is as good as the HP3631A Power Supply means getting a programmable resolution of 1mv for the low voltage range and 10mv for the high voltage range. The circuit below achieves these goals with a high degree of accuracy and no missing codes throughout the range. The design also exceeds the dynamic voltage and current range of the HP shown in the table below. Furthermore I made a statement that I would aim to not only achieve the same resolution but I would also attempt to improve on it by a factor of 10, that means getting a resolution of 100µV on the low voltage range and 1mV on the high voltage range. The 16 bit resolution of the DAC was not quite enough to achieve this, there were missing codes so I used the DAC modulation technique I used for the 12-bit DAC and extended the 16-bit DAC to 18 bits of resolution which allowed me to achieve the ten-fold programming resolution with no missing codes across the entire range – marvellous 🙂
Here is a brief video overview of the modified hardware and test environment
And here is a video demonstration of programming, measuring and the achieved resolution.
I focused some more on noise measurements and found that modulating the output of the 16-bit DAC created no detectable ripple – at least with the test equipment that I have. In fact the noise I am measuring swamps any ripple that is being created now. Interestingly, the digital signals from the micro controller driving the DAC (the SPI bus) is now creating more noise than the ripple effect of switching between two adjacent codes. Because the digital switching does impose some noise, there is a compromise to be had – you can get higher resolution but suffer some additional noise. For low-noise applications you can forego the additional resolution and get better signal to noise performance. Thankfully this can be controlled entirely in software so can be easily made a programmable option which is what I will do.
Of course this is just the control circuitry, I have no idea how the noise or accuracy will be represented through the linear regulator part of the design in practice – we shall see.
I have broken the schematic into several pages to make it easer to read.
I am happy that the control circuitry and the firmware is now good enough for a Version 1 baseline – this is what we have now. I have increased each range to show the possible extent of each gain option. In the final design the power and voltage ranges required and programmed in the UI/front panel will dictate the actual upper limits of each range, but this table shows the extent of what is possible.
| Volt Range |
Volt Resolution |
Volt Steps |
Current Range |
Current Resolution |
Current Steps |
Regulator Gain |
|
|---|---|---|---|---|---|---|---|
| 0-8v | 1mv/1µV | 8000/80000 | 0-8A | 1mA/0.1mA | 8000/80000 | 64W max | x2 |
| 0-20V | 10mV/1mV | 2000/20000 | 0-20A | 10mA/1mA | 2000/20000 | 400W max | x5 |
| 0-40V | 10mV/1mV | 4000/40000 | 0-4A | 10mA/1mA | 4000/40000 | 160W max | x10 |
In Part 10 I am going to create the first PCB for the project – Whoo-hoo. However, instead of designing the entire PSU printed circuit board at this stage I am going to focus on the digital control circuitry with the ADC, DAC and Analog switch only. I am going to create a small PCB as a module with a simple 0.1″ pin header (Arduino shield style) with the ADC, DAC, Analog switch, PIC micro controller and power supply parts so I can do the first cut of a board layout to make sure the grounding and noise issues are addressed. It’s not my intention to make this part of the final PSU module but it will be a useful module for prototyping other systems and of course I will not waste too much time if I get it totally wrong :/
Catch you next time….
This content is published under the Attribution-Noncommercial-Share Alike 3.0 Unported license.


Hi,
werry interesting project.
Would it be a problem if I want to make it handle 0-30V and 20A?
I’m gonna connect maybe 6 fets in parallel.
And a preregulator is an interesting thing, but I think to do commutation of a transformer windings.
thanks
You can scale it up as much as you want, the thing you need to take into consideration is the resolution you want. The higher output voltages and currents are simply applied as multipliers as far as the controller is concerned. The controller as it currently stands has a control voltage range of 0-4.096 volts and has a control resolution of 16-bits. The ADC has the capability to measure 40,000 counts (down to 10uV steps) so as long as you scale down resolution as you scale up output levels it will all still work. The other thing to consider is the high-side shunt and current sense amp. My design assumes 0-5A at which point 2.5w is dissipated across the 0.1R shunt, you will need to do something different here if you want to scale that up to 20A. I did think about mains transformer winding taps but decided against it because of the relatively high cost of custom transformers, by designing for a single winding you can use readily available off the shelf low cost transformers. If I had the experience I would love to design a switching buck regulator for the pre-regulator, I do now have the tools so perhaps that will form the basis for a V2 design.
I was thinking about using +-20A analog current transducer which is already designed to be used with ADC. 2.5v @ 0A and 5v +20A and ofcourse 0v @ -20A.
Hi, your project is getting wonderful, very professional!
You want to implement a function “TRACKING” to control another module regulator? In this case a dual power supply?
thank you very much
Yes thats the plan. The PSU module will connect with up to four other modules to create a 4 channel PSU. The front end controller (the one that will work the front panel and display) will include software that will enable two or more modules to track each other. You will see the design already has an opto-isolated serial interface, this will allow fully isolated channels in the PSU. I am a couple of blog posts behind, I will see if I can get part 10 done this weekend.
Hey Gerry,
I’ve been following in and out for several months but have noticed you haven’t published Part 10 yet. Is the piece expected out any time soon? I know how you feel when it comes to DEX, DipTrace, etc. – I bought DipTrace a year ago hoping to move over from Eagle Professional but I always find myself back in Eagle to finish the design for manufacturing. I noticed DEX a half a year ago and the price was too good to ignore so I bought a year of updates, but later found the UI a bit too busy, keep it around and might look again into it…we’ll have to see. Also I use a MAC almost entirely with VMWare Fusion for PC emulation, DEX doesn’t run too well in that environment.
Personally for the money DipTrace is a deal (still hoping for a native edition one day), Eagle is a little too costly and some of the features are a bit a$$ backwards but I’ve invested most of my time and parts design into it sooo…
I’m considering following your design for myself, as I need a nice programmable PS on my bench. Keep up the awesome work and thanks for sharing.
Chris
Toronto, Ontario, Canada
Hi Chris,
I am still on the case but work commitments recently have slowed me down. I will post Part 10 very soon. I know what you mean with DipTrace, despite its woes its definitely usable. In part 10 you will see two PCBs I have made for the PSU using it.
Thanks for following the blog.
Gerry
Sir can you please provide the source code for programmable power supply,we cannot find any link to download it.
Hi,
I can’t offer any support etc, so provided as-is, with no warranty implied 🙂 uploaded the micro-controller code here: https://github.com/gerrysweeney/psu-pic18f2523.git
Gerry