This is a short follow-up to a video where I was recently testing a Mayyuo M9711 DC Electronic Load (See Here) and I was using an Agilent E3634A Power Supply (which I previously fixed) as a power source. When I put the DC load into pulse mode within a few seconds the E3634A PSU exploded. What I heard was a loud pop, and a flash followed by a loud vibrating 50Hz hum, by which time I was able to reach the power switch and shut it down. I switched to another supply and continued with the test of the M9711 but today I thought I would open up (once agin) the E3634A and see what damage was done and what I found is a real mystery!
Did I imagine it all? Was there beer involved? Who knows, its a mystery!
Hope you enjoyed the video, catch you next time…
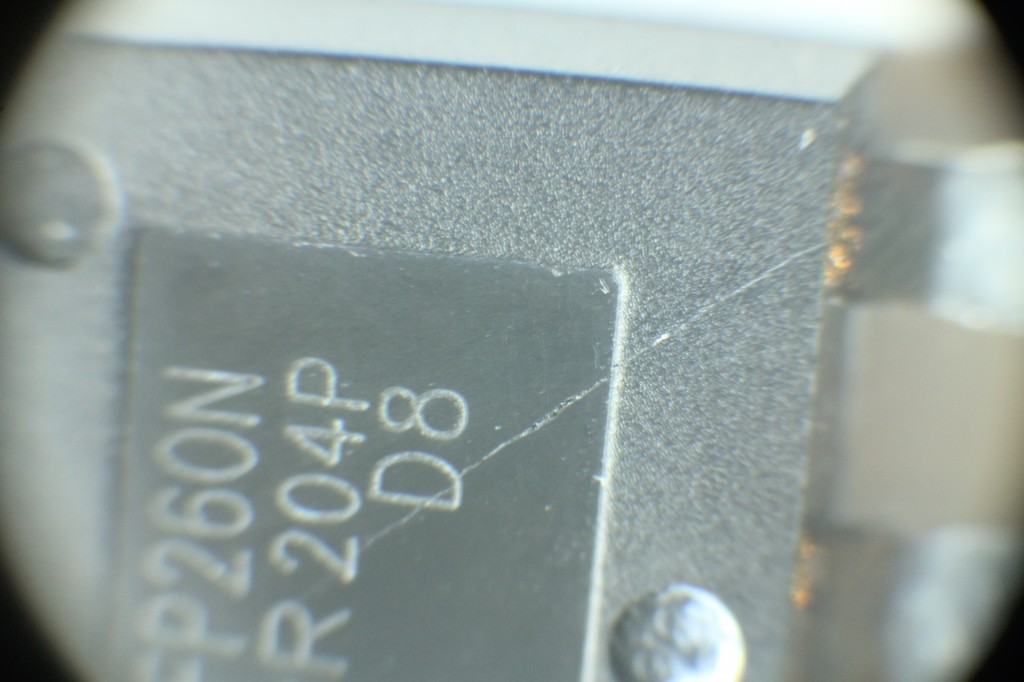
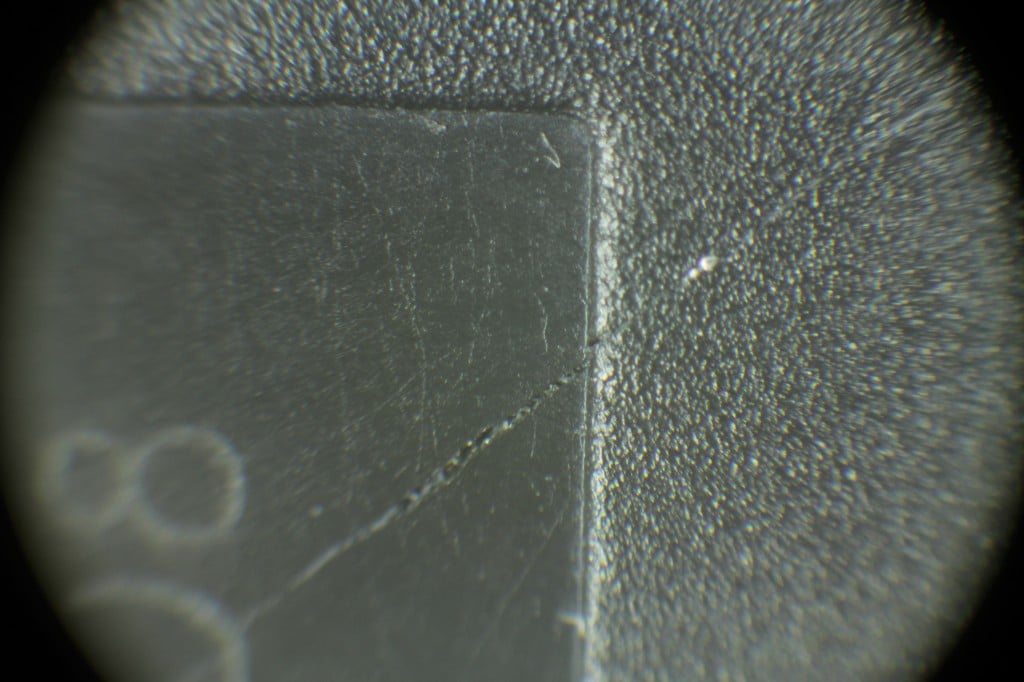
UPDATE – I found the smoke source
While tidying up I thought i would have a look at the two power MOSFET’s that failed and found the IRFP260 has a very small but visible smoke vent! I have added the photo’s below, I had to take these under the microscope x10 and x30 to see it. With the naked eye it looks like a light scratch.
I have been working on various power supply projects of late and was finding that my approach to loading PSU with simple incandescent laps was limiting. What I needed was a programmable DC load so I wondered – build or buy? Because I am already working on a PSU I decided that its probably better to buy one if I can find something that was reasonable quality and at a reasonable price. So I searched around and eventually took a chance on a Maynuo M9711 DC Electronic Load. I had not heard of the company before and could not find much out about them on on the internet, what I did see what that other similar devices that cost twice as much and had a reputable brand (BK Precision for example) were so similar in form that I thought its a good chance that they are different OEM’s of the same design. I am not sure that is the case because I do not have a BK Precision to compare, but I bought the M9711 brand new from the manufacturer on the basis that this was likely the case. Was I disappointed with the purchase? we shall see…
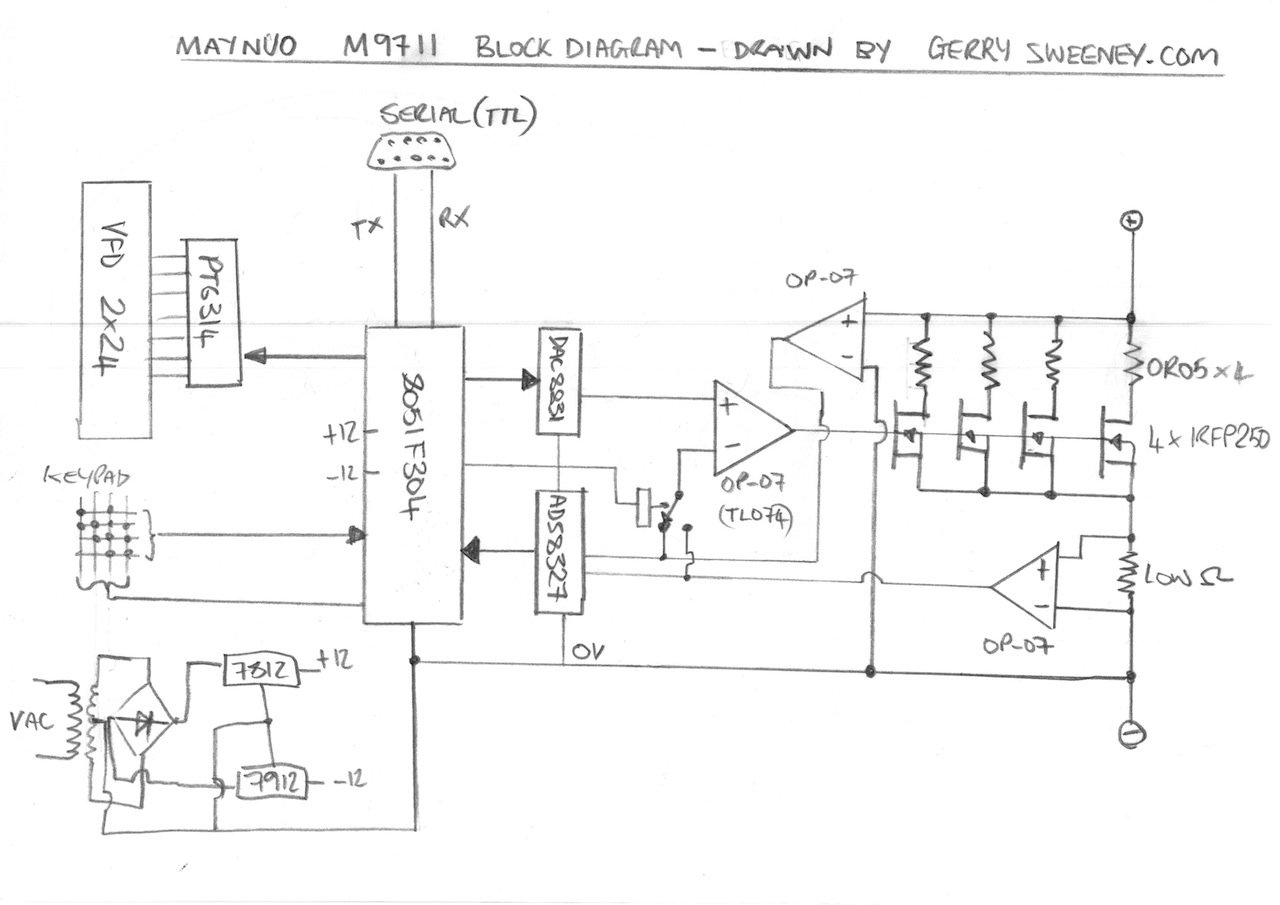
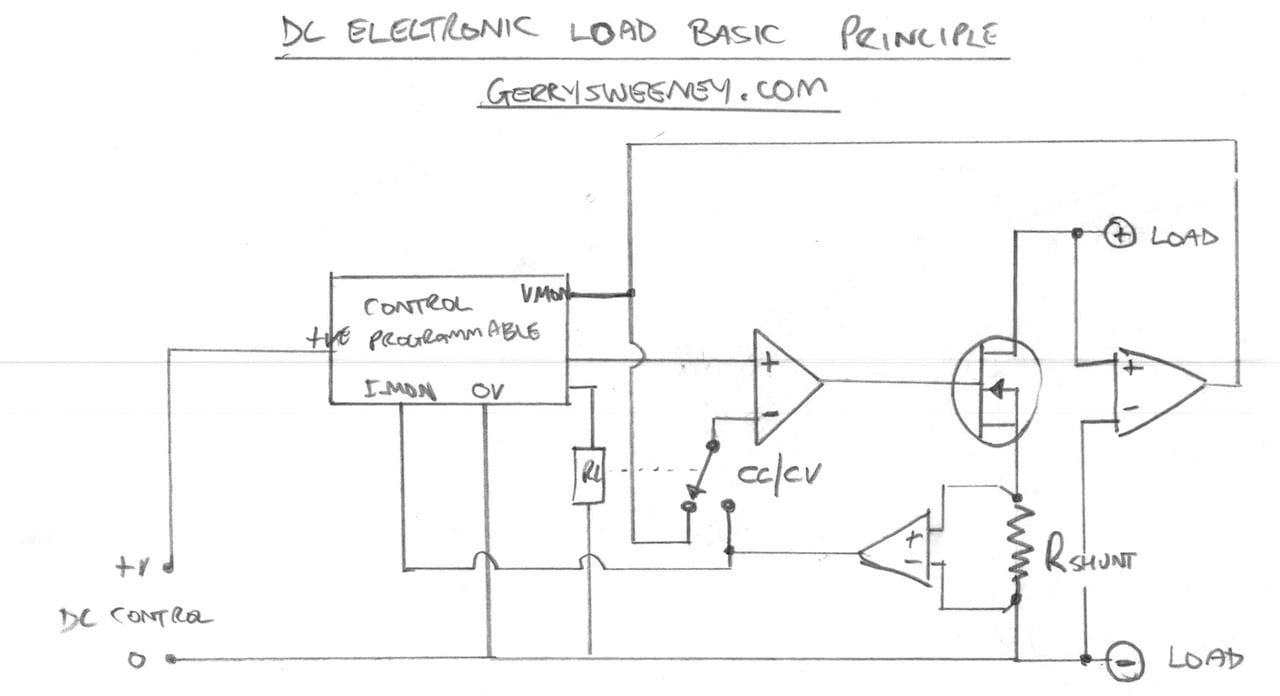
In this video I unbox and then tear down the Maynuo M9711 DC Electronic Load so we can take a look inside and see how it works and how well its been built. I try to explain how a DC electronic load works and I present a block diagram of the Maynuo M9711 based on my understanding and the cornerstone components that I find.
The main funcional components found in the device are:
The power MOSFET (x4 in 150W model) used as the main active power device that creates the load load
Notes and Diagrams
Below are the diagrams I present in the video describing the operation of a DC Load and the basic high-level layout of the M9711. You can browse these images or download a PDF document to print out if you prefer.
Well I hope you find this useful, thank you for reading and watching, catch you next time…